Setting Rings
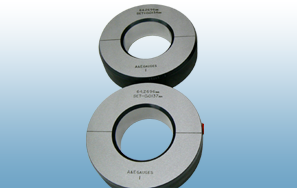
A&E Setting Rings are manufactured from the finest materials to very exacting standards for precision, surface texture and stability. They are heat treated to a minimum hardness of 59 Rockwell 'C' and are specially processed for long term stability. They are then calibrated in temperature controlled conditions by qualified staff.
The size difference between the High and Low standard is dictated by the type of measuring head used e.g. Full Scale, Half Range or Tolerance. For Tolerance gauges the minimum separation is 0,01mm/0.0004in.
Grade 'X' & Grade 'XX' setting rings can be supplied to order. All setting rings can be UKAS certified or issued with an in house Certificate of Conformity.

Manufacturing Tolerances (units:- 0.001mm (µm)
Setting gauge
size |
Nominal
mm |
Accuracy of determination of measured size |
Permissable departure of mean measured size from nominal diameter |
Geometric form |
| > |
< |
Grade 1 |
Grade 4 |
Roundness |
Parallelism |
| 1.50 |
2.97 |
+/-0.50 |
+/-1.0 |
+/-2.50 |
0.50 |
0.50 |
| 2.97 |
25.00 |
+/-0.50 |
+/-1.0 |
+/-2.50 |
0.50 |
0.50 |
| 25.00 |
61.95 |
+/-0.75 |
+/-1.0 |
+/-2.50 |
1.00 |
0.75 |
| 61.95 |
101.85 |
+/-1.00 |
+/-2.0 |
+/-5.0 |
1.50 |
1.00 |
| 101.85 |
150.00 |
+/-1.50 |
+/-2.0 |
+/-5.0 |
2.0 |
1.25 |
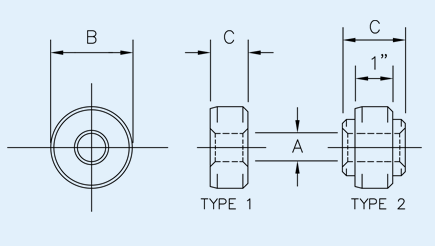
Setting Ring Dimensions
| Ø A Reference mm |
B |
C |
| > |
< |
mm |
mm |
| - |
6 |
24 |
8 |
| 6 |
12 |
28 |
10 |
| 12 |
18 |
42 |
15 |
| 18 |
24 |
56 |
20 |
| 24 |
32 |
72 |
25 |
| 32 |
42 |
90 |
30 |
| 42 |
52 |
100 |
30 |
| 52 |
62 |
110 |
30 |
| 62 |
74 |
130 |
35 |
| 74 |
86 |
142 |
35 |
| 86 |
100 |
154 |
35 |
| 100 |
120 |
184 |
38* |
| 120 |
140 |
210 |
38* |
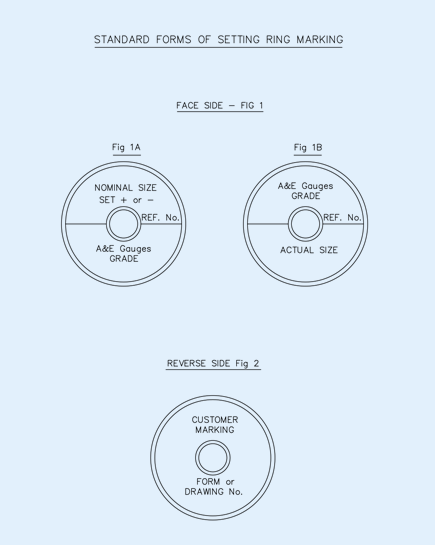
Standard Forms Of Marking
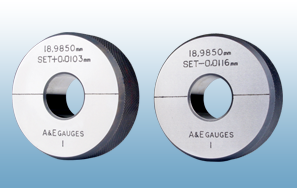
Setting Rings for air gauge applications are normally marked with the basic size corresponding with Centre Zero and Set 'Plus', Set 'Minus' values on the high and low rings respectively. Alternatively, if required the actual size can be marked on the setting ring.


